Choose either 11CT or 14CT counted or no-count cross stitch kit. The size of the project will depend on which aida count you choose. (Frame not included in any purchases)
Each counted cross stitch kit includes:
Aida fabric
DMC numbered cotton
Reference sheet
Clear instructions
Needle
Each no-count cross stitch kit includes:
Printed aida fabric
DMC numbered cotton
Reference sheet
Clear instructions
Needle
How to Diamond Paint?
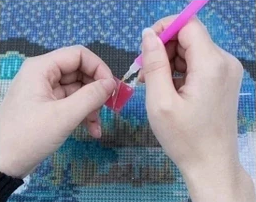
If you're new to diamond painting, you've come to the perfect place! Below are step by step directions on how to get started. Anyone can do it; it's incredibly simple!

Step 1
Refer to the comparison table on the canvas to identify each diamond number and the corresponding printed number on the canvas.

Step 2
Insert the round end of the dotting pen into the dotting cement (push hard to keep the cement in place).

Step 3
Use the round end of the pen to stick a diamond and slightly press down to remove any extra cement.

Step 4
Tear apart the partial film and place the diamond on the canvas according to the corresponding number.

Step 5
If you stick a diamond to a wrong area on the painting, remove the diamond with tweezers.

Step 6
After finishing, slightly press down the diamonds with your hand or a book to ensure that the diamonds are firmly attached.
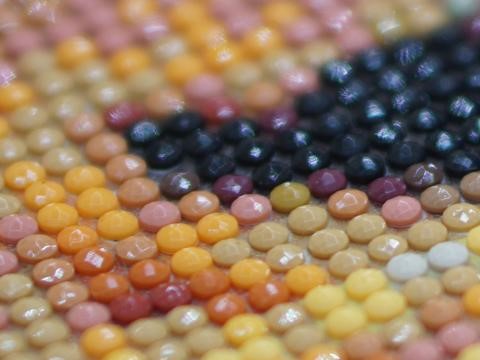
AB is short for Aurora Borealis. This refers to the solid colour diamond drills with a beautiful Aurora Borealis rainbow coat that gives it an opalescent shine on the surface. The appearance can differ, it can be a shiny soft pearl-like coating to a strong dual-colour reflection. They are used to highlight parts of the diamond painting pattern adding dazzling and mesmerizing effects to the art, just like the northern light it got its name from

This is the comparison of the regular diamonds & Aurora Borealis:

This picture is showing AB drills included in a diamond painting to give a better effect:

Do I choose Round or Square shaped diamonds/drills?
If you have just begun to embark in this new hobby of Diamond Painting, you might be wondering what shape of diamonds to use on your very first work of art. Well, there is really no wrong way! To help you make your decision, we've prepared this short guide. Let’s take a quick look at their difference.
Round Diamond Drills

Round diamonds, especially on larger sizes, have a more sparkly appearance similar to glitter. They are generally preferred by beginners because they are easier to put on the canvas without needing to have straight lines - the exact placement of the pieces is a lot more forgiving without needing too much adjustment. This shape works better on larger sized artworks because it is generally faster to place. Since they have no corners, round diamonds can create some visible gaps in the picture. These are most visible for smaller size canvases. However, from a distance, the gaps are compensated by the colour of the background and become unnoticeable.
Square Diamond Drills

Square drills create sharp lines and clean picture since they fit together very nicely with no gaps. Though it requires some skill to line up the square diamonds perfectly, the finished artwork can be incredibly rewarding. Experienced veterans with a steady hand may opt for this shape to bring a bit of challenge to their craft. Square diamonds may be preferred when creating smaller canvases due to the longer time taken and no gaps between the pieces, but is still a suitable choice up to medium-large size artworks. Many fans of Square drills also find pleasure on how the pieces create a satisfying “snap” sound when they fit into place.

You May Also Like
- Choosing a selection results in a full page refresh.


